
Friday, December 5, 2014
Gluten-Free Product Review: Celentano Gluten-Free Ravioli
I have been dreaming of gluten-free fresh or frozen pasta for a while now, so I was very excited to pass the frozen pasta section at our local Publix and spy a whole bunch of new gluten-free options! The gluten-free cheese ravioli was my first pick to try, and it was a complete win. I slightly undercooked it because I like al dente. I only lost two in the cooking, and it was enough (with a small salad) for a meal for two. The texture and flavor is perfect, and you simply add whatever sauce you choose. I tried to go back for the meat ravioli, but the case was cleaned out. I hope the grocery manager takes that as a sign to keep stocking.
Sunday, November 23, 2014
Gluten-Free Product Review: Pillsbury Gluten-Free Refrigerated Pie and Pastry Dough

The crust is the only real challenge when it comes to gluten-free pie. While Pillsbury's refrigerated dough gets points for convenience and texture (flaky but sturdy) the taste is where it falls down. I have never had a pie crust so oily that it sizzled when it came out of the oven. The flavor is somewhere between soybean oil and salt, and not at all complementary to a sweet pie. It might work out for a savory pie, but I still believe it would be too salty and overpower the filling.
Frankly, if I had to choose between this and a crustless pie, I would go crustless. It's a shame, because I would love the convenience of a good ready-made pie crust.
Saturday, October 25, 2014
Recipe Box: Homemade Chicken Noodle/Chicken and Rice Soup
This was a mainstay comfort food of our childhood, and every
Thanksgiving after the carcass had been plucked nearly clean she would
get out the stock pot and make gallons of turkey noodle soup for the
freezer.
You’ll need:
leftover chicken or turkey with bones
6-8 carrots
6-10 stalks of celery
1 large onion
2 cloves garlic
either noodles or rice
Large stock pot with lid.
If you’re making the stock to serve with noodles use 3 stalks of celery. If you’re using rice, use the 5 stalks. As mom put it, “for some reason rice always wants more celery.” Use the whole celery stalk (leaves and all) for best flavor in the stock.
Strip any pieces of meat left on the bones. Discard any stuffing or herbs still in the cavity. Otherwise skin, bones, leftover pan drippings and nameless wobbly bits go in the stock pot, meat goes in a separate bowl you stick in the fridge until the stock (broth) is made.
Chop 4 carrots, 3-5 stalks of celery and onion into big chunks (about 1”) and toss into the stock pot with the bones etc. Peel and crush the cloves of garlic and add that as well.
Add water until everything’s covered. Heat to a simmer then cover, turn down to low and let simmer for 3-4 hours. You can also toss everything in the crock pot and let simmer all day or overnight, but you won't get as much stock unless you have a very large crock pot. I make this during the week in stages, first night I make the stock, the next night I make the soup.
Strain through a colander into a bowl. Go through the colander and pick off any additional bits of meat you missed the first time. Toss them in the stock pot, then discard everything else you strained out. Pour the contents of the bowl back into the stock pot or freeze to use later.
Turn the heat back up to medium until the stock is simmering. Chop remaining celery and carrots into bite-size pieces, and add to pot. Add the meat you set aside earlier plus noodles or rice, and simmer according to rice or noodle package directions (about 20 minutes for white rice, 40 for wild rice, 10 for rice noodles, 15 for corn/quinoa noodles). Salt and pepper to taste.
Either the stock or the soup can be frozen in freezer-bags. It’ll last longer if you make sure there’s no air trapped in the bag. The stock can be frozen in ice cube trays, then bagged for use in flavoring rice, pasta or sauces.
The traditional chicken soup recipe leaves a lot of room to play with flavors. Try adding artichoke hearts or spinach in the last ten minutes of cooking, or maybe a little lemon juice, black pepper, wild rice and fresh asparagus. Up the garlic content and add cilantro and chili peppers for a cold and flu soup.
Saturday, October 18, 2014
Perfect Gluten-Free, Gum-Free Sugar Cookies (a.k.a. Cut-Out Cookies)
This is adapted from my Grandma Harris's recipe, which was a staple in our household every Christmas. The kids would get to decorate the shapes any way we liked and we always burned a batch for dad (who still insists that he likes them better that way).

In my lack of advance planning, I found out that I don't actually own any cookie cutters. I'm not sure how that happened! It's possible that they were lost in the move, and I haven't attempted a gluten-free, gum-free adaptation for cut-outs since we came to Atlanta. So these are boring old squares, waiting for yummy frosting!
Ingredients:
1 1/2 cups superfine white rice flour
1 1/2 cups tapioca starch (plus extra for rolling)
1 cup confectioner's sugar (powdered sugar)
2 teaspoons baking powder
1/2 teaspoon salt
1 cup softened butter (2 sticks)
2 large eggs, beaten
3 tablespoons cream
1 1/2 teaspoons vanilla
For sugar cookies, you will also need 1/2 cup granulated sugar. For frosted cut-out cookies, you will need buttercream frosting (recipe at end of this post).
Directions:
Mix all the dry ingredients in a large bowl.
Cut in butter with a pasty cutter, pair of knives, or large fork until it is crumbly.
Add wet ingredients, mix well until smooth dough
Cover with plastic wrap and refrigerate for at least half an hour
After it is finished cooling, preheat oven to 350 degrees Fahrenheit
For Cut-Out Cookies:
Dust a countertop and rolling pin with tapioca starch
Roll dough out to about 1/8 inch thickness
Use cookie cutters to cut out shapes
Place on ungreased cookie sheets at least 1/2 inch apart
Repeat until all the dough is used up
For Sugar Cookies:
Put a layer of granulated sugar in a bowl
Roll dough into 1 inch balls
Roll each ball in granulated sugar
Place on ungreased cookie sheet
Use a fork to press dough down in one direction, then again crossways to form a # pattern
For Both:
Bake at 350F for 8-12 minutes (less for softer cookies, more for crisper). Switch sheets after 5 minutes to keep them baking evenly. Baking time will depend on your oven.
The resulting cookies will still be pale on top, but will be starting to brown around the bottom edges. They will be more pale than you would expect from the same cookie made with wheat flour, so don't bake them too long and scorch the bottoms.
Let cool for five minutes, then slide a spatula under each to make sure they don't stick to the cookie sheet. Let cool completely before frosting or handling too much.
Buttercream Frosting:
1/2 cup softened butter
1/2 cup shortening
4 cups confectioner's sugar (powdered sugar)
1 teaspoon vanilla extract
2 tablespoons milk or cream
Optional: Frosting coloring, sold in tiny jars in baking supply and craft stores.
*for chocolate: 1/4-1/2 cup cocoa powder, to taste
This is easiest in an electric mixer, but you can successfully make frosting by simply whipping it with a fork. It will be much fluffier and easier to make in a mixer though.
Mix the softened butter and shortening
Mix in sugar 1/2 cup at a time, waiting until it is all incorporated before adding the next 1/2 cup
*tip: slow the mixer down when adding the sugar, or it will explode all over the kitchen
Mix in cocoa powder a tablespoon at a time until it tastes right for you
Mix in vanilla and cream
whip for one minute to fluff
Separate into batches for each color and mix in coloring*
*Use a toothpick to add coloring paste: dip it into the paste, then run it through the frosting, using a fresh toothpick each time so that you don't contaminate the color. A TINY amount goes a long way, but it will instantly stain anything else it touches (like counters, clothes, and skin). You can use regular food coloring for pastel tints.
Frost the cookies at room temperature, but the leftover frosting lasts a week in the refrigerator or nearly forever in the freezer. Let it return to room temperature before using again.
Monday, June 2, 2014
Recipe Box: Chicken Pot Pizza
On a night when I am out of everything for pepperoni pizza, I tend to be stubborn about the pizza part. This uses the thin-crust recipe from Food.com I reviewed HERE, but I lowered the liquid content to prevent it from becoming soggy in baking.

Crust:
2/3 cups white rice flour
1/2 cup tapioca or potato starch
1 tablespoon sweet white rice flour
3/4 cup hot water
2 teaspoons yeast
1/2 teaspoon sugar
Cornmeal for sprinkling on pan (optional! You can also line pan with parchment paper)
Olive Oil for spreading crust
Toppings:
2 cups chicken pot pie vegetables (I used carrots, broccoli, garlic and corn, but use up whatever leftovers you have) cut into small pieces. These can be cooked or uncooked.
1 cup cooked shredded chicken
4 slices cooked bacon, crumbled
1 cup chicken gravy, or 1 cup broth plus 1 tablespoon corn starch
1 cup shredded cheddar or colby-jack cheese
- If you aren't using already-made gravy, cook the broth and corn starch over medium-high heat until very thick, stirring occasionally.
- If you are using raw vegetables instead of leftovers, toss them with the gravy in an oven-safe dish, and leave the dish in the oven while it is pre-heating and pre-baking the pizza crust. this cooks the veggies perfectly for the pizza. If you are using cooked vegetables, just cut them into pieces, toss them with the gravy, and set them aside.
- Pre-heat the oven to 450 degrees Fahrenheit
- Mix the yeast, sugar, and water in a bowl and set aside to proof. If the yeast does not start getting foamy in 5 minutes, it has gone bad. Replace it with new yeast.
- Mix the starch and flours in a separate bowl
- Sprinkle a pizza pan with corn meal
- Pour about 1/3 cup of olive oil into a small bowl
- When the yeast has at least 1/2 inch of foam on the surface, mix it with the flours using a spoon. It should be a thick batter consistency, like brownie batter. If it is too thick (more like wheat bread dough) add warm water a tablespoon at a time. If it is too thin, add white rice flour.
- Pour the batter onto the pizza pan.
- Dip your fingers in olive oil and spread the dough very thin, using short pats. If it starts to stick to your fingers, dip them in the olive oil again.
- When the dough is evenly spread in the pizza pan, bake it plain for 15 minutes.
- When it comes out, add the toppings. Start with the vegetable mix, then add the chicken, bacon, and a sparse layer of cheese.
- Bake an additional 10 minutes or until bubbly.
- Heavy duty kitchen shears work better than an ordinary pizza cutter to cut slices with this crust.
- Ranch dressing makes a great dip for this, especially for kids
- If the crust comes out soggy, increase the flour/decrease the liquid for a crisper crust next time, and make sure it is getting the full 15 minute pre-bake at 450 degrees.
Saturday, May 24, 2014
Recipe Box: Chocolate Cream Pie from Scratch

If you've ever had real chocolate cream pie, the kind not made from a pudding mix, you know what I'm talking about. I started out using Emeril Lagasse's recipe on the Food Network for the filling, and found it horribly, over-the-top sweet. It was so over-sugared that you couldn't really tell there was chocolate or cream in there as well. So I gave it a makeover, with less sugar, more chocolate, and a gluten-free crust.
For the crust:
I use this gluten-free pie crust recipe from Land O'Lakes. You can eliminate at least the extra xanthan gum from the recipe, and possibly from the flour mix as well (although it might be more fragile).
Filling:
3/4 cup heavy whipping cream, plus 1/2 cup to use later
3/4 cup whole milk
1/2 cup white sugar
3 1/2 tablespoons corn starch
6 ounces semi-sweet chocolate, finely chopped or grated (I used 3/4 cup of semi-sweet mini chocolate chips, which work as-is)
1 tablespoon butter
1 teaspoon vanilla extract plus 1/2 teaspoon to use later
4 egg yolks
- Set up the egg yolks in their own small bowl (with room for whisking)
- Set up the chocolate, butter, and vanilla in a medium glass or metal mixing bowl (heat-resistant)
- Put 3/4 cup heavy whipping cream, milk, sugar, and corn starch in a medium pot. Stir until sugar is dissolved.
- Heat sugar/cream mixture over medium-high heat, stirring constantly and whisking occasionally. Once it boils, turn down heat to medium and cook for 5 minutes, stirring.
- Temper the eggs by adding a tablespoon of the cooking mixture slowly into the egg yolks while whisking the yolks. Repeat for two more tablespoons.
- Add the tempered egg mixture back into the cooking pot and whisk well for 2 minutes.
- Pour the mix into the bowl with the chocolate, butter and vanilla. Whisk until the chocolate and butter are melted.
- Cover the mix with plastic wrap in contact with the surface (to keep a skin from forming) and refrigerate for 30 minutes.
- After 30 minutes, whip the remaining 1/2 cup of whipping cream and 1/2 teaspoon vanilla to stiff peaks.
- Gently fold the whipped cream into the chocolate custard.
- Pour mix into the baked pie crust
- Refrigerate for at least 4 hours, or overnight, to fully firm up before serving.
Whip up additional cream to top when serving.
Friday, May 23, 2014
Recipe Adaptation: Gluten-Free Potstickers

If you haven't found it already, Crysty at Garden of Gluten Free has a fabulous recipe for the dough needed to make your own pot-stickers gluten free. I have devious plans to turn the same dough into ravioli and pierogi this month.
So I use her dough, but a very different filling. The recipe makes more filling than you need, because you'll really want to mix the extra into ground beef the next day and make potsticker burgers. You'll thank me later.
First, mix the filling and set it aside to marinade.
Filling:
1/2 pound ground pork
1 cup shredded cabbage (you can use a cheese grater to shred it, but if you buy it as a pre-shredded cole-slaw mix, the carrots won't hurt the flavor at all!)
1 tablespoon minced fresh ginger*
3 cloves minced fresh garlic*
1 whole green onion (white and green parts)*
1 tablespoon sesame oil*
1 tablespoon rice wine vinegar*
2 tablespoons soy sauce*
*For each of these, double the amount called for and set half of it aside in another bowl for the dipping sauce.
Dipping Sauce:
1 tablespoon minced fresh ginger
3 cloves minced fresh garlic
1 whole green onion (white and green parts)
1 tablespoon sesame oil
1 tablespoon rice wine vinegar
2 tablespoons soy sauce
2 tablespoons dark brown sugar
1/2 cup water
Go to The Garden of Gluten Free, where she has a great step-by-step with photos for the dough and cooking the dumplings.
To keep one batch of dumplings warm while you cook another, set up a double boiler with a layer of parchment paper lining the top pot. Place the cooked dumplings in layers, with parchment paper dividing them. They will glue to each other if they are touching. Cover the pot to trap steam.
The next day, mix the leftover filling half and half with ground beef and cook as hamburgers. The dipping sauce also makes an excellent burger mix-in, or marinade for chicken or steak.
Thursday, May 22, 2014
Recipe Box: Homemade Boba and Bubble Tea from Scratch

I'm from a little town in Southwest Michigan. When I moved to Atlanta, Georgia, I was very excited to have my horizons opened up to a wide range of new foods. One thing I became quickly addicted to was bubble tea.
For those of you who don't know, bubble tea is a relatively new Taiwanese drink made from dark-brewed black tea in milk, sweetened and iced. You can get it with boba, which are large tapioca pearls. The combination of bitter, sweet, and chewy is amazing. Unfortunately, it is a sometimes treat for me. Not only do I risk contaminating JD with gluten (as I have no idea whether the drink is gluten-free) but the caffeine affects my sleep and anxiety for days afterwards.
So began my quest to make decaf, gluten-free bubble tea at home.
It turns out that the only roadblock is the tapioca pearls. Most of the large pearl tapioca we can get in the U.S. is a direct import from China or Thailand, and I couldn't find any manufacturer that would confirm their product was gluten-free.
What I did find was this Snapguide by Carolina Moura on making your own boba from scratch.
So this recipe is adapted from the snapguide, but with added detail I had to find out from trial and error.
For the Boba:
1/2 cup tapioca starch
Boiling water (start with 1 cup)
Optional: a few drops of food coloring or frosting dye

The water must be at a full rolling boil. The heat and moisture activate the starches in the tapioca, making them gel. If you don't use boiling water, the pearls will fall apart when they hit the water to cook later.
There is no exact proportion because it varies based on the starch, the humidity, and other unknown factors. Boil a cup of water, and add a little at a time to the starch, setting the pot back on the burner to keep boiling between adds.
When the tapioca is about the consistency of play-dough (but more elastic and inclined to stick to your fingers) then it is ready. I used a spatula to stir, but if you have heat-proof sillicone gloves they will work beautifully to knead the starch.
Dust a surface with starch and keep your hands dusted with it throughout. Wash your hands as needed if dough builds up on your fingers.
Break off tiny pieces of dough at a time. They will expand in the water, so make the pearls 1/2 the size you think you want to end up with. Roll the piece on your starch-dusted palm to make into a ball shape (does not have to be perfect). Set on a piece of parchment paper to dry. Try to get the balls about the same size for cooking consistency.
Leave out to dry overnight. Mine were not "dry" in the morning as they still had a soft center, but the outside was crusted over enough to hold together in cooking.
If you made a big batch, you can freeze what you don't want to cook right away. Cooked pearls last less than a day, so only cook what you need.
Prep the Tea
Brew a dark black tea by using three tea bags in two cups of water. I used decaf tea, but caffeinated will work just fine. Bring to a simmer and turn off the heat to let steep. Once it is cool enough, transfer to a container and store in the fridge.
Make a simply sugar syrup using 1 part sugar to 2 parts water. Bring to a boil (stirring constantly) cook for 2 minutes, then remove from heat. You can store this in the fridge as well, for up to a week (when it gets cloudy and starts forming crystals, discard it).
Make the Boba
Bring a large pot of water to a boil. Use about 3 times more water than you think you need, because too little water will become starchy and keep the pearls from cooking through.
Once it is at a rolling boil, drop in the tapioca pearls and stir to separate them. Cover the pot and boil for 15 minutes.
Turn off the heat and let sit, covered, for an additional 15 minutes. The boba should be translucent, with no more than a few white spots of uncooked starch, and chewy.
Mix the Tea
Drain boba and drop into glass for bubble tea. Add sugar syrup and let sit for 5 minutes to absorb sugar.
Add tea and milk (to taste). Add ice as needed and stir.
Cut the end of a large smoothie straw at an angle (so that the boba are sucked up into the straw).
Enjoy your bubble tea!
Wednesday, May 21, 2014
Gluten-Free Product Review: Hidden Valley Ranch
For years, Hidden Valley Ranch dressing has stubbornly avoided our pleas to make their salad dressing gluten-free. Let's face it, no other ranch dressing tastes quite as good! I should know; I've tried somewhere near a dozen in the years since giving up gluten.
But now, this year, Hidden Valley dressing bottles are suddenly sporting a new gluten-free label! It is on all the ranch variants available at my local publix (regular, bacon, and buttermilk) and on the newer packets of mix powder. Older packets of mix powder are not labeled, but I don't know if it means they are not gluten-free. You may need to simply wait for stock to turn over, or contact Hidden Valley with the product code on a specific packet to find out (make sure they know it's an older packet).
So now it is time for me to go overdose on carrot sticks and ranch dressing.
I am neither affiliated with nor compensated by the makers or sellers of products I review. All gluten-free information is based on a combination of product packaging, manufacturer information, the Cecelia's Marketplace Gluten-Free Grocery Shopping Guide, and personal experience with a Celiac partner sensitive below 20ppm.
Sunday, April 13, 2014
Recipe Modification: Perfect Thick-Crust Bready Pan Pizza (and Cheese Bread)

I started with Simply Gluten Free's recipe for easy gluten-free french bread (it is my go-to bread recipe, and turns out an amazing loaf).
I left out the xanthan gum and added 3 teaspoons milled chia seeds mixed well with 6 teaspoons hot water. See my post on substituting chia for xanthan gum for details on this substitution. The chia gives the crust a chewier texture without the "gum" aftertaste.
Use a 12" cast-iron pan, if possible, or a 12-inch cake pan will do (but won't get the bottom as crispy). Don't use a teflon coated pan; it can't take the heat. You will need an additional small loaf pan or 8" cast-iron pan as well. The original recipe makes too much batter, so I turned the leftover into cheese bread. You can, of course, make two small pizzas in 9" cast-iron pans.
Prepare the bread recipe as above to the point where you are mixing the dough for several minutes in the stand mixer. Then come back to this page. It's okay, I'll wait....
Modification:
Keep the mixer going for about 5-6 minutes total for a lighter crust.
While it is mixing, melt 2 Tablespoons butter in the larger pan. Add 2 Tablespoons olive oil. Grease the smaller pan with shortening, or coat bottom and sides with olive oil.
Spread the batter in the larger pan to approximately 1/2 to 3/4 inch deep (depending on how thick you want your crust). Dipping your fingers in olive oil will allow you to spread the batter without it sticking to your fingers. You will use the olive oil later for the cheese bread anyway, so pour about 1/3 cup into a bowl and use it for spreading.
Spread the leftover dough in the smaller pan.
Preheat the oven to 450 degrees Fahrenheit. Set the pans in a warm but not hot place (I put them on the top of the oven away from the vent) to rise. Let them rise about 20 minutes.
Bake at 450 for 25 minutes.
While it is baking, mix 2 Tablespoons grated Parmesan cheese, 1/4 teaspoon onion powder, 1/8 teaspoon grated garlic powder, and a pinch of fresh grated black pepper and sea salt to the leftover olive oil and mix well. This gives the flavor some time to emerge.
Add pizza sauce, cheese and toppings to the larger pizza. Brush the smaller crust with the olive oil/cheese/spice mix and sprinkle with a thin layer of mozzarella.
Bake both for an additional 15 minutes. The larger pizza may need an additional 5 minutes if you added a lot of toppings.
Let cool for 5 minutes before cutting.
Thursday, April 10, 2014
Product Review: Prairie Bread from Whole Foods' Gluten-Free Bakehouse
There are two kinds of manufacturers of gluten-free baked goods. The old-school is stuck in the era where if it has the same vague shape and color as the thing it's imitating (say, a loaf of bread), then it's good enough, no matter what it tastes like (and then charges $12 for a crappy loaf of bread).
The new-school realizes that they have a lot of competition these days and that there have been innovations in gluten free cooking that improve texture and taste to where it is almost indistinguishable from the real thing (and then charges $12 for a good loaf of bread).
Clearly, the Gluten-Free Bakehouse at Whole Foods is old-school. Their Prairie Bread, visually, resembles plastic foam with bits of seed embedded in it. It is not only dry, mealy and crumbly (even after toasting), but somewhere between tasteless and gum-flavored around the various seeds. As a bonus, it made me really sick all night. They must put whole tablespoons of xanthan gum and half a dozen eggs in it to create the binder-overkill that it is. I suppose the upside is that they only charge $6.00 for it, so when I throw the rest into the trash it won't hurt as much.
The lesson? Unless you can get it same-day from a gluten-free bakery (and one that lets you try a sample first) it is probably better to take the time to make your own.
Thursday, April 3, 2014
Recipe Review: Quick Pão de Queijo (gluten-free cheese bread)
This was the first version of the Pão de Queijo I made, and it was mighty tasty. I have since learned the wonder of a more traditional recipe, which takes longer but is well worth it in taste and texture! But sometimes, you just want some Pão, and you want it now. When that happens, this blender recipe works beautifully:
http://allrecipes.com/recipe/brazilian-cheese-bread-pao-de-queijo/
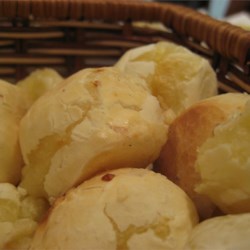
(photo from allrecipes.com)
They were scrumptious, but need a few notes and modifications. A lot of the reviews were from people who lived in or visited Brazil, so I give those reviews much more weight.
The biggest complaints in the reviews were from Americans who were expecting these to turn out like bread or biscuits. Tapioca starch has two textures: crispy and rubbery. You can make them more airy by using a stand mixer for four minutes before scooping, but the super-chewy center is how it is supposed to turn out. Make them smaller than the recipe calls for (1-2 tablespoon scoops instead of 1/4 cup) to balance out the crunchy/rubbery textures.
I also had to bake them for 20 minutes instead of the 10-15 called for. They probably could have stood another 5 minutes after that. But don't mistake the dense center for underbaked; as said before, it's supposed to be like that.
Because it is, essentially, a super-chewy bread, I might leave out the garlic next time and use it to satisfy my bagel cravings. I have yet to find a really good gluten-free bagel recipe... one that doesn't turn out to be sandwich bread baked in a bagel shape. I can imagine that these pao de queijo with a little cream cheese might just hit that bagel chewiness I miss.
The reviews generally agree that these do not freeze well, and should be eaten the same day. Tapioca starch does funny things when it sits, so it doesn't surprise me a bit that they turn into inedible rubber balls. Since they are so quick to make, however, they make a good side for a big dinner, or a non-perishable snack for a picnic. The recipe is easily halved for serving one or two.
http://allrecipes.com/recipe/brazilian-cheese-bread-pao-de-queijo/
(photo from allrecipes.com)
They were scrumptious, but need a few notes and modifications. A lot of the reviews were from people who lived in or visited Brazil, so I give those reviews much more weight.
The biggest complaints in the reviews were from Americans who were expecting these to turn out like bread or biscuits. Tapioca starch has two textures: crispy and rubbery. You can make them more airy by using a stand mixer for four minutes before scooping, but the super-chewy center is how it is supposed to turn out. Make them smaller than the recipe calls for (1-2 tablespoon scoops instead of 1/4 cup) to balance out the crunchy/rubbery textures.
I also had to bake them for 20 minutes instead of the 10-15 called for. They probably could have stood another 5 minutes after that. But don't mistake the dense center for underbaked; as said before, it's supposed to be like that.
Because it is, essentially, a super-chewy bread, I might leave out the garlic next time and use it to satisfy my bagel cravings. I have yet to find a really good gluten-free bagel recipe... one that doesn't turn out to be sandwich bread baked in a bagel shape. I can imagine that these pao de queijo with a little cream cheese might just hit that bagel chewiness I miss.
The reviews generally agree that these do not freeze well, and should be eaten the same day. Tapioca starch does funny things when it sits, so it doesn't surprise me a bit that they turn into inedible rubber balls. Since they are so quick to make, however, they make a good side for a big dinner, or a non-perishable snack for a picnic. The recipe is easily halved for serving one or two.
Saturday, March 29, 2014
Featured Gluten Free Product: Starbust Jelly Beans
GLUTEN FREE FEATURED PRODUCT
A regular postings of gluten-free products that I use myself and are available in my local grocery store. You can check your local store for these items, order them online, or ask your store to stock them. I do not have any relationship with the companies in question, nor do I receive any form of compensation for these reviews. Gluten-Free status is based on information from the manufacturer, the current Cecelia's Marketplace shopping guide and personal experience, and may change if the company changes formulation or manufacturing processes.

Easter is coming up, and it is hard to find anything "jelly" or "gummy" that is gluten-free. Luckily, Starburst jelly beans (all flavors) are safe in the U.S.. My personal favorites are the sours, of course, but they also come in all reds, tropical, and mixed-up flavors. The ingredients vary by region, so use Wrigley's contact form to ask about specific allergens in products where you live.
A regular postings of gluten-free products that I use myself and are available in my local grocery store. You can check your local store for these items, order them online, or ask your store to stock them. I do not have any relationship with the companies in question, nor do I receive any form of compensation for these reviews. Gluten-Free status is based on information from the manufacturer, the current Cecelia's Marketplace shopping guide and personal experience, and may change if the company changes formulation or manufacturing processes.
Easter is coming up, and it is hard to find anything "jelly" or "gummy" that is gluten-free. Luckily, Starburst jelly beans (all flavors) are safe in the U.S.. My personal favorites are the sours, of course, but they also come in all reds, tropical, and mixed-up flavors. The ingredients vary by region, so use Wrigley's contact form to ask about specific allergens in products where you live.
Sunday, February 23, 2014
The Cure for Xanthan Gum
Xanthan gum is ubiquitous in gluten-free baking. Gums like Xanthan and Guar are meant to replace the stickiness of wheat gluten which binds the particles of flour and other ingredients together. Without a binder, bread falls apart in crumbs instead of holding together in a slice.
Unfortunately, many people have trouble with gums in the quantity used in gluten-free baking, including symptoms like bloating, cramping, constipation, and other digestive upset. In addition, gum can give baked goods an unpleasant aftertaste and pasty feel in the mouth, even enhancing the grittiness of rice flours.
I've been experimenting with replacement binders, and the best I've found is milled (ground) chia seeds. They're inexpensive (about half the price of xanthan gum!) easy to find on Amazon or in health stores, and substitute 1:1 for xanthan gum. You can also buy whole seeds and grind them in a coffee grinder, in which case measure the ground seeds, not whole.
To use, you take the same amount of chia seeds as the recipe calls for in xanthan gum, or 3/4 of the amount called for in guar gum. Mix the seeds with twice as much hot water and let sit until it forms a thick gel. Add the gel to the other ingredients and mix really well (for breads, use a stand mixer and mix for at least 3 minutes on medium speed). Add 15 minutes to the baking time called for in the recipe, but check after 10.
As an example, I successfully used ground chia seeds in my favorite gluten-free french bread recipe from Simply Gluten Free. As the recipe calls for 3 teaspoons of xanthan gum, I instead used 3 teaspoons of ground chia seeds in 6 teaspoons of very hot water. I let it gel, then added it with the other wet ingredients. I added 15 minutes to the bake time.
The results were much better than with the gum; super moist and chewy bread with no aftertaste or gummy feel. The chia did add a barely noticeable, but pleasant nutty flavor. I used black chia seeds, so if the flavor is an issue, try white chia instead.
The bread was super-moist. If your baked good is already very moist (like cake) you may want to eliminate some liquid to balance the addition of the chia. I would leave out liquid equal to the amount of hot water you used in the chia, and then check at the normal bake time to see if it needs the additional 15 minutes.
Note that if you are already using chia or flax as an egg substitute, you may be able to simple leave out the gum and have the recipe turn out just fine! Try it before you bother adding additional seeds.
The downside: Baked goods with Chia seem to stale out faster (not that any gluten-free baked good really lasts). The bread I made yesterday is a bit crunchy today, but refreshed well in the microwave. I would count on, as soon as it's cool, either crumb-sealing cakes and cupcakes or freezing them. Wrap bread tightly and refrigerate, or slice and freeze. You can also let it stale out and make it into stuffing, french toast, bread pudding, casserole, etc. the next day.
Sunday, January 19, 2014
Best Gluten-Free Thin Crust Pizza Recipe
After trying nearly a dozen gluten-free thin-crust pizza recipes over the years...I finally have a winner. THIS RECIPE from Food.com user ukichix has the fewest ingredients, and happens to make a perfect crispy, slightly chewy thin crust. For those with multiple sensitivities, it also happens to be casein, soy, dairy, gum and egg-free.
UPDATE: 10/18/14
I have made quite a few improvements to the recipe, so I am posting my modified version here instead of linking to the original:
1/2 cup white rice flour
2/3 cup tapioca or potato starch
2 tablespoons sweet white rice flour
1 tablespoon active dry yeast
1/2 teaspoon sugar
Just shy of 1 cup hot tap water (start with 1 3/4 and add if needed)
handful of cornmeal for dusting pizza pan
Bowl of olive oil for spreading dough
Let rise in a warm place for 20-30 minutes.
Bake for 15 minutes
Spread sauce, cheese, and/or toppings, and bake for an additional 8-10 minutes until done.
A few notes on the making:
1. If you are just starting gluten-free, replace your old pizza stone. There is no way to remove the gluten remnants from the pores of the stone, and it can contaminate anything you bake on it.
2. Heavy duty kitchen shears work better to cut the pizza than a rolling pizza cutter or knife.
This recipe also makes a quick garlic crackerbread appetizer with spreadable goat cheese. Here's how:
UPDATE: 10/18/14
I have made quite a few improvements to the recipe, so I am posting my modified version here instead of linking to the original:
1/2 cup white rice flour
2/3 cup tapioca or potato starch
2 tablespoons sweet white rice flour
1 tablespoon active dry yeast
1/2 teaspoon sugar
Just shy of 1 cup hot tap water (start with 1 3/4 and add if needed)
handful of cornmeal for dusting pizza pan
Bowl of olive oil for spreading dough
- Let the yeast, sugar and water sit in a warm place to start bubbling. If it doesn't start forming bubbles/foam on top after five minutes, your yeast has gone off and needs replacing.
- Preheat the oven to 450 degrees Fahrenheit
- Sprinkle/dust a pizza pan or cookie sheet with cornmeal
- mix flours
- Stir in water/yeast/sugar mix and stir until incorporated. You should have a wet dough that clumps instead of drips, but isn't so dry that you can handle it with your hands without it sticking. Like thick mud.
- Spread it in the pizza pan with oiled fingers, and dip your fingers in the oil each time the dough starts to stick. You want it no thicker than 1/8 inch in any one place. A patting motion works better than a smoothing motion to spread the dough.
Let rise in a warm place for 20-30 minutes.
Bake for 15 minutes
Spread sauce, cheese, and/or toppings, and bake for an additional 8-10 minutes until done.
A few notes on the making:
1. If you are just starting gluten-free, replace your old pizza stone. There is no way to remove the gluten remnants from the pores of the stone, and it can contaminate anything you bake on it.
2. Heavy duty kitchen shears work better to cut the pizza than a rolling pizza cutter or knife.
This recipe also makes a quick garlic crackerbread appetizer with spreadable goat cheese. Here's how:
- Make the recipe as listed
- During the first 15 minute bake, mix 1/4 cup olive oil, 2 tablespoons grated Parmesan cheese, 1/4 tsp garlic powder, 1/4 tsp onion powder, 1/4 tsp dried oregano, and a dash of salt and pepper.
- After the initial 15 minute bake, brush olive oil mix over entire crust (to the edges).
- Bake for an additional 7-8 minutes, keeping a close eye on it to prevent burning.
- Cut into squares for homemade crispy garlic flatbread, and serve with soft cheeses or bruschetta.
Subscribe to:
Posts (Atom)